# Authentication (/docs/basic-concepts/authentication)
Every API call carries a token. After reading this page you can create a secret token for your server, get a limited token for a shopper's browser, give a token only the permissions it needs and switch between test and live data.
## Send the token [#send-the-token]
Put the token in the `Authorization` header with the word `Bearer` in front of it.
```bash title="Request"
curl https://api.comecero.com/api/v1/products \
-H "Authorization: Bearer $COMECERO_TEST_TOKEN"
```
A missing, expired or unknown token gets `401` (code `invalid_token`). A valid token that may not do what you asked gets `403` (code `insufficient_permissions`).
## The three token types [#the-three-token-types]
| Type | Where it runs | Who gets it | Lifetime |
| --- | --- | --- | --- |
| Secret | Your server only | You, from the dashboard or the API | Until you delete it, or until the expiry date you set |
| Trusted | A browser, in a tool for signed-in staff | A dashboard user when they sign in | 2 hours from its last use |
| Limited | A shopper's browser | Anyone, without a token | 2 hours at first, longer as it is used |
A token starts with its type and its mode, for example `secret.live.` or `limited.test.`, so you can tell them apart at a glance. There is no "public" or "private" key: these three are the only tokens you use.
### Secret tokens [#secret-tokens]
A secret token is for your server. It can do anything its permissions allow, across your whole account. Keep it in an environment variable or a secrets store.
Never put a secret token in a browser, a mobile app or a public repository. Anyone who has it can act as your server. If one leaks, delete it at once and make a new one.
A secret token never expires unless you give it an `expires` date. Secret tokens may also send `user_ip_address` and `user_agent` in the query string, to pass on the shopper's details when your server calls the API for them.
### Trusted tokens [#trusted-tokens]
A trusted token belongs to a dashboard user. The user gets one when they sign in at the Comecero sign-in page, and the dashboard uses it in the browser. It has the same permissions as that user, so to change what a trusted token can do, change the user's roles ([Update a user](/api/users/update-user)).
You cannot create a trusted token with the API. A trusted token lasts 2 hours from its last use, so it stays alive while the user keeps working. It may set prices on carts and invoices, which a limited token may not.
If you build your own tool for your staff, it signs users in through OAuth 2.0 (implicit grant) and receives the trusted token in the URL fragment as `access_token`. List the addresses your tool may be sent back to in `oauth_redirect_uris` ([Update technical settings](/api/settings/update-technical-settings)).
### Limited tokens [#limited-tokens]
A limited token is for one shopper's browser. It works like a session: it can read your public catalog, and it can change only the carts, payments and other objects it created itself. When the shopper pays, the token can also read the order, invoices and subscriptions that came from that payment.
A limited token may not send prices (`reference_price` and `reference_currency` on a cart item get `403`). Prices come from your products.
Give each shopper their own limited token. Do not share one token between shoppers: a token tied to too many carts and customers is refused with `422` (code `binding_limit_exceeded`).
## Create a secret token in the dashboard [#create-a-secret-token-in-the-dashboard]
### Open API Tokens [#open-api-tokens]
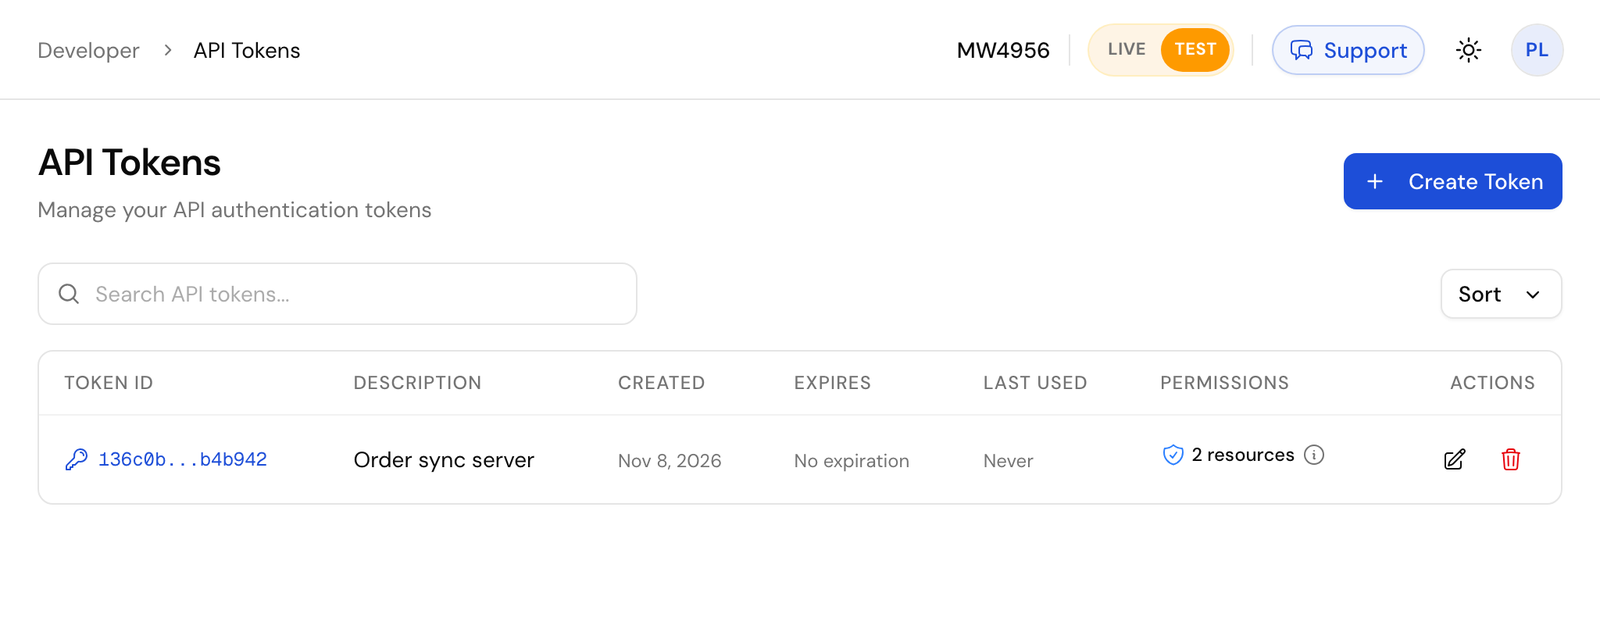
In the dashboard, go to **Developer > API Tokens** and click **Create Token**.
### Choose the mode [#choose-the-mode]
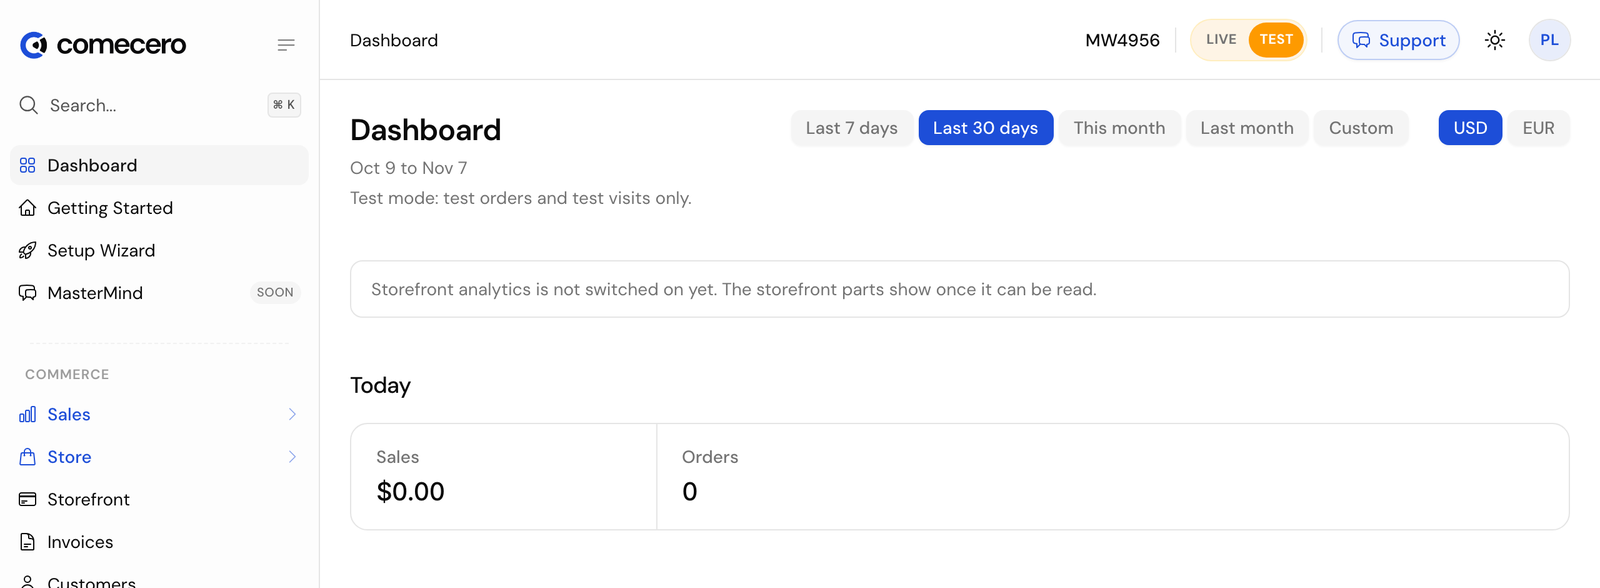
The token is made in the mode the dashboard is in. Use the **Live/Test** switch in the header to pick test before you start. Make test tokens while you build.
### Fill in the form [#fill-in-the-form]
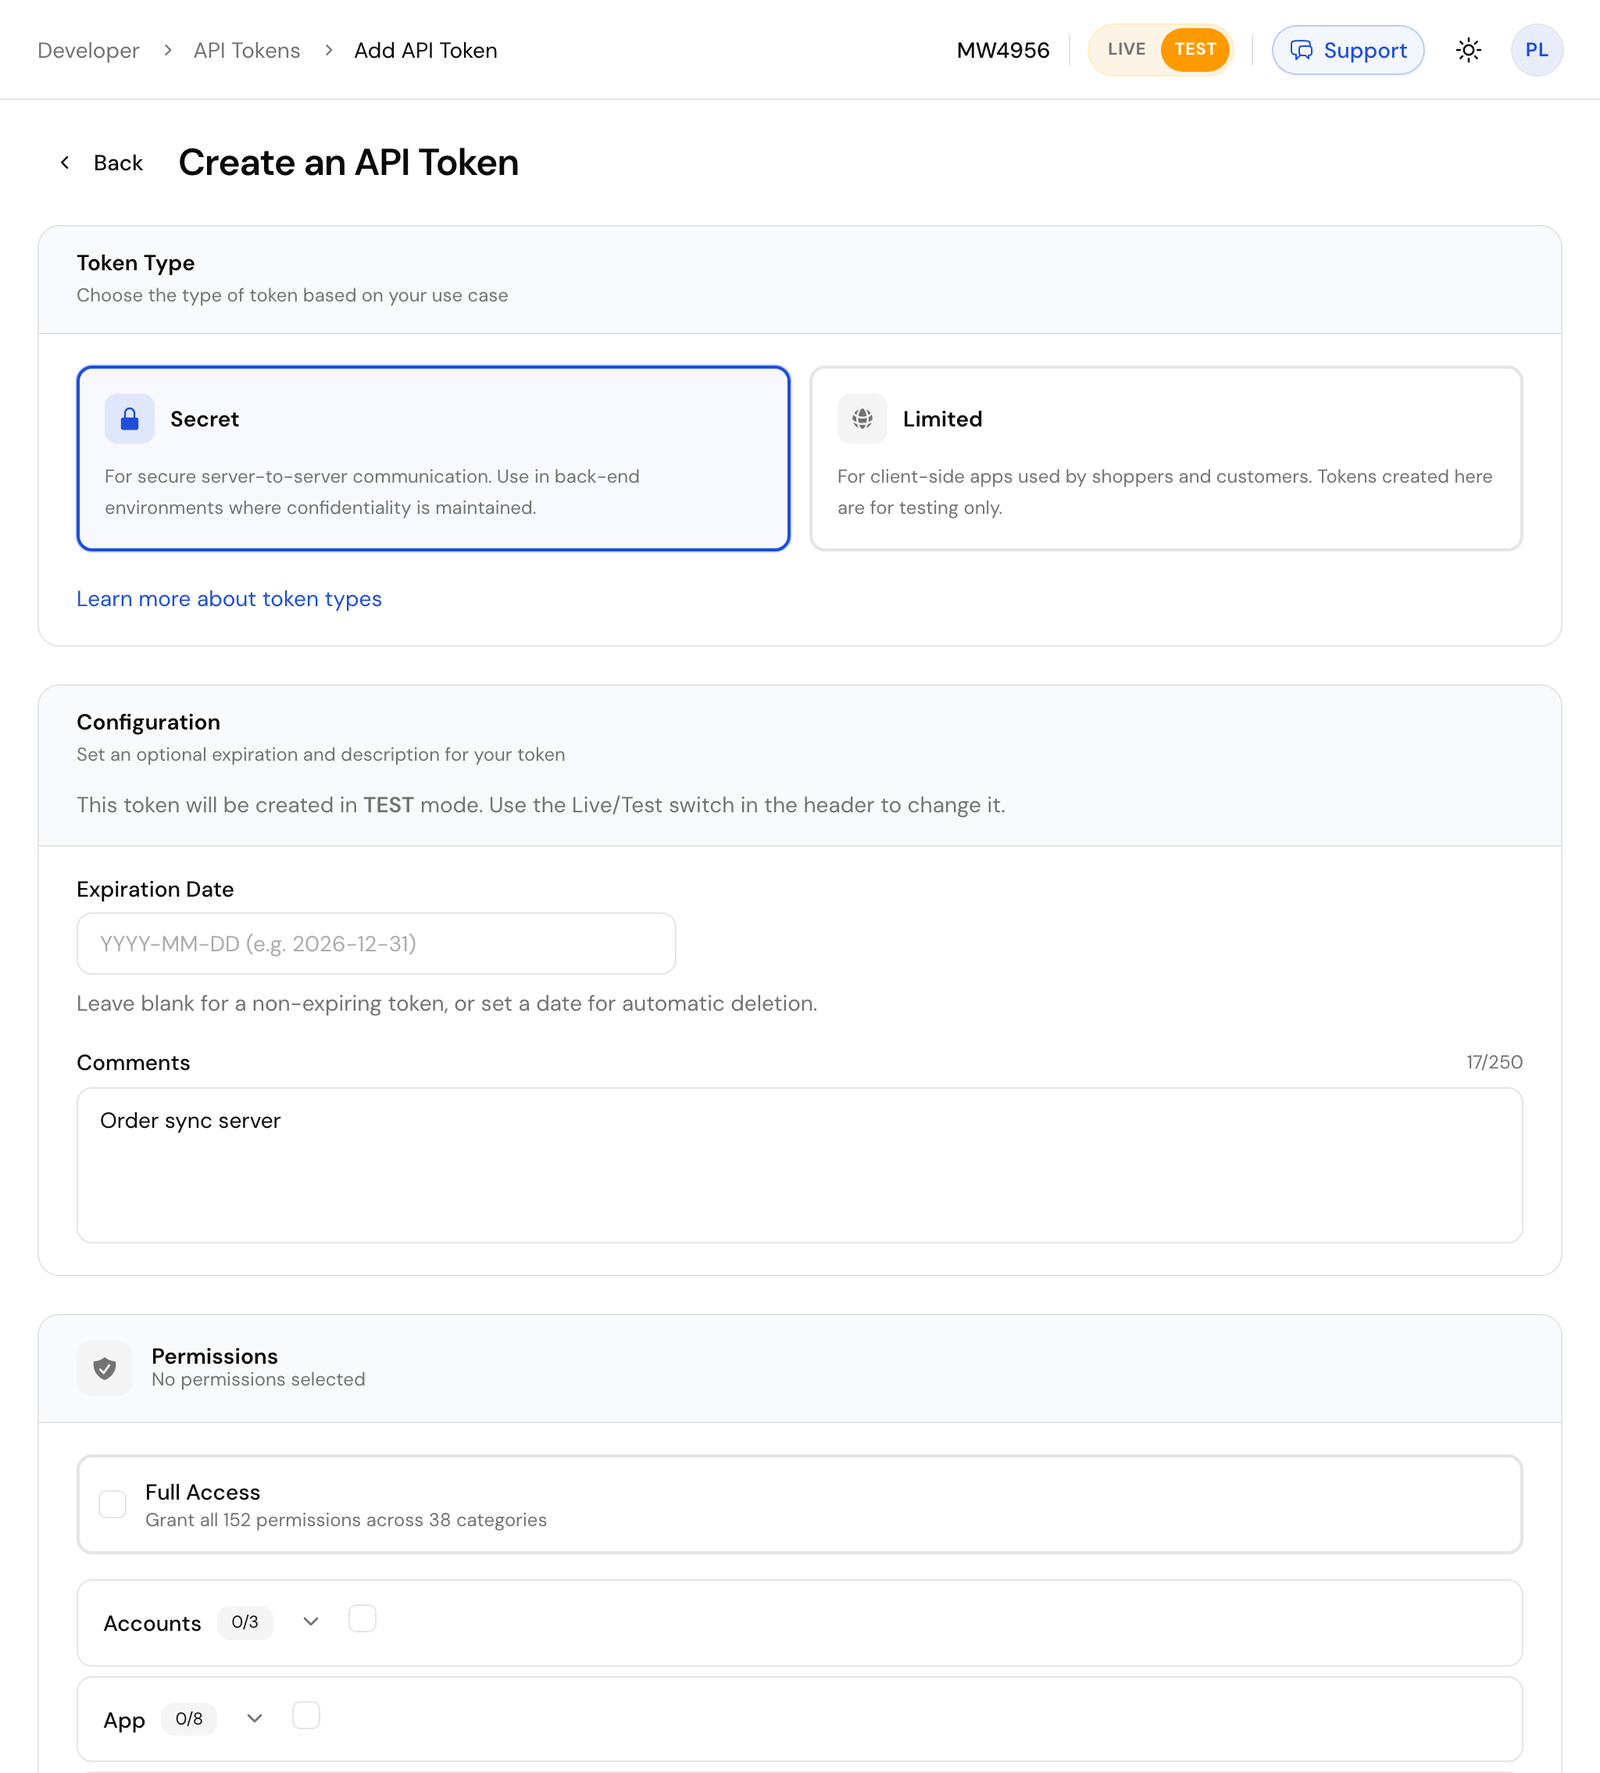
Choose **Secret** as the token type. Under **Configuration**, set an optional **Expiration Date** and a **Comments** note that says what the token is for. Under **Permissions**, tick only what your server needs, or **Full Access** for every permission.
### Copy the token [#copy-the-token]
Click **Create Token**. The full token is shown once, on the **API Token Created** screen. Copy it into your server's secrets now. After this page you only see a masked copy, such as `secret.test.Hq7...4c1e`.
You can also create one with the API: [Create a secret token](/api/auths/create-secret-auth). The token you call with must hold every permission you give the new one.
```bash title="Request"
curl -X POST "https://api.comecero.com/api/v1/auths/secret?test=true" \
-H "Authorization: Bearer $COMECERO_TEST_TOKEN" \
-H "Content-Type: application/json" \
-d '{
"comments": "Order sync server",
"permissions": [
{ "resource": "orders", "methods": ["read"], "allow": true }
]
}'
```
```json title="Response"
{
"object": "auth",
"type": "secret",
"test": true,
"token": "secret.test.Hq7Zp2LkQ8rT1vWm3XyB6nCd9FgJ0sAe5uIo4hKl7Ec.1793887012.4b9e2d1c4e",
"expires": null,
"comments": "Order sync server"
}
```
## Get a limited token in the browser [#get-a-limited-token-in-the-browser]
A shopper's browser asks for its own limited token. Call [Create a limited token](/api/auths/create-limited-auth) with your account ID in the query string and no `Authorization` header.
```js
async function getLimitedToken() {
const saved = localStorage.getItem('comecero_token');
if (saved) return saved;
const response = await fetch(
'https://api.comecero.com/api/v1/auths/limited?account_id=AB1234',
{ method: 'POST' },
);
const auth = await response.json();
localStorage.setItem('comecero_token', auth.token);
return auth.token;
}
```
Keep the token for the shopper's visit (in a cookie or `localStorage`) and send it on every call. Ask for a new one only when a call answers `401`.
The page must run on an origin your account allows, or the API answers `403` (code `invalid_origin`). See [CORS](/docs/basic-concepts/cors).
### How long a limited token lasts [#how-long-a-limited-token-lasts]
A new limited token lasts 2 hours. Each use moves the expiry forward, and a token that keeps being used lasts longer:
| Uses so far | Expiry after each use |
| --- | --- |
| 1 to 5 | 12 hours |
| 6 to 10 | 24 hours |
| More than 10 | 15 days |
So a bot that loads one page leaves a token that dies in 2 hours, while a real shopper can come back to their cart days later. A limited token your server makes for one customer (with `customer_id`, see below) always lasts 2 hours from its last use.
Every response to a call made with an expiring token has an `X-Token-Expires-In-Seconds` header, which browsers can read.
### A limited token for a known customer [#a-limited-token-for-a-known-customer]
Your server can make a limited token for one existing customer, so their browser can read and update that customer (for example a "my account" page). Call [Create a limited token](/api/auths/create-limited-auth) with a secret token and send the customer:
```bash title="Request"
curl -X POST "https://api.comecero.com/api/v1/auths/limited" \
-H "Authorization: Bearer $COMECERO_TEST_TOKEN" \
-H "Content-Type: application/json" \
-d '{ "customer_id": "0106784119870CueWmZ9P7" }'
```
The secret token needs permission to create tokens and to update customers. The new token has the mode of your secret token. Hand it to the customer's browser only after you have signed the customer in yourself.
## Give a token only what it needs [#give-a-token-only-what-it-needs]
Each secret token holds a list of permissions, or roles that hold them. A permission names a resource and the methods allowed on it:
```json
{ "resource": "orders", "methods": ["read"], "allow": true }
```
Methods are `create`, `read`, `update` and `delete`. `*` means all of them, and a resource of `*` means every resource the token type may use. To see the resources a token type may be given, call [List token permission options](/api/auths/get-auth-options) with `type=secret`.
Make one token per server or job, each with the smallest set of permissions it needs. A token that syncs orders to your accounting system needs `orders` `read`, not full access. Change a token's permissions with [Update a token](/api/auths/update-auth), and see what a token can do in its `effective_permissions`.
To check your own token, call [Get a token](/api/auths/get-auth) with `me` as the id. To revoke one, call [Delete a token](/api/auths/delete-auth), or delete it under **Developer > API Tokens**.
## Test and live [#test-and-live]
Test and live data are kept apart by the token. A test token reads and writes only test data; a live token only live data. There is no test header and no separate test URL.
- When you create a token, `test=true` in the query string picks a test token. [Create a secret token](/api/auths/create-secret-auth) makes a live token unless you send `test=true`, and only a live token may create a live token.
- A browser gets a live limited token by default. It can get a test one with `test=true` only when your account turns on `allow_public_limited_test_tokens` ([Update technical settings](/api/settings/update-technical-settings)); otherwise the answer is `403`.
- A dashboard tool can swap a live trusted token for a test one with [Create a test trusted token](/api/auths/create-trusted-auth).
Build and test with test tokens. Test payments run on the test gateway every new account has; the test card numbers are in [Create an account](/docs/getting-started/create-an-account). Switch to live tokens only when you go live.
## Next steps [#next-steps]